Raspberry Pi and GrovePI Hat
The Raspberry Pi is a single board computer which runs the Linux operating system. On top of our Raspberry Pi boards, we stack a GrovePi Hat. This is an extension board for the Raspberry Pi which allows it to be connected to a range of sensors using standardised connector cables.
Connecting sensors
Sensors are connected using 4 pin Grove cables to the various different grove connectors on the GrovePi board. There are 3 main classes of sensor connection port on the board - digital, typically used for sensors which are either on/off, analog, used for sensors that report a range of values and i2c, a serial bus connection which allows sensors that do something complex, such as accelerometers to be connected to the GrovePi. You can tell which type of port each one is by looking at the writing on the GrovePi for small text next to the port that says D3,D4,…,D8 for digital ports, A0,A1,A2 for analog ports and I2C1,I2C2 etc. for I2C ports. When using a sensor, you must plug it into the correct class of port. The sensor quick reference lists which port each type of sensor connects to.
Input and output
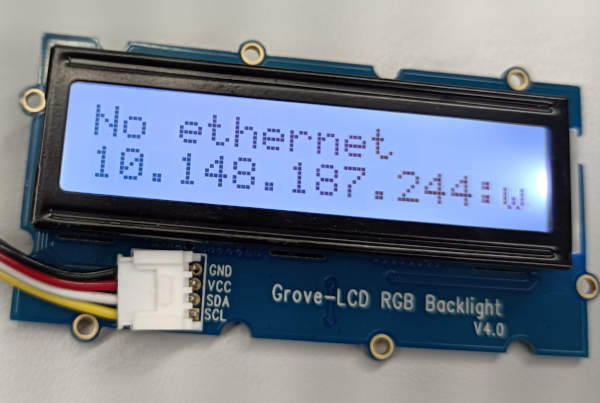
The Pi boards in this course are used headless. This means that it does not have a proper screen, keyboard, mouse or other input and output devices that you would usually use to communicate with the system. This is quite typical for hardware device development, with development being done externally using a standard computer. There is a small display which can be used to output up to 32 characters of text from your programs. The display is also used to show the network address of the device on initial startup.
Communicating with the Pi
To communicate with the Pi, we connect to it over the network using the Secure Shell (ssh) protocol. This allows us to do two things - to access a text terminal where we can run commands on the Pi, and to copy files to and from the Pi.
The first thing we need to know is the ip address of the Pi that we are using. To do that, we need the Grove LCD display to be plugged into one of the I2C ports on the GrovePi when we start it up. On startup the display will show the address of the Pi

Windows instructions
To connect to the Raspberry Pi and run commands on it we need a terminal connection, using a protocol called ssh. On Windows, I recommend that you use the Putty software. Open up putty, enter the ip address that you see on your grove LCD display, and click Open.
If the connection works okay, you should see another window open, and it should ask you ‘login as:’. Type the username dss password dss, and you should be at a terminal. This is running on the Raspberry Pi. If you type commands into the terminal, it will run things on the Pi. For example if you want to run a python script called test.py, type python test.py and hit return.

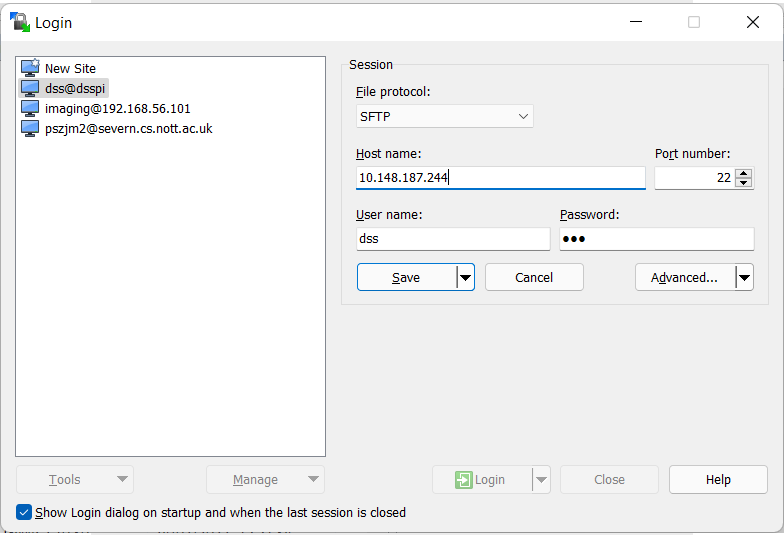
Before you can run your python scripts, you need to copy them from your computer onto the Raspberry Pi. To copy files across, we need a secure file transfer protocol(SFTP)program. I use WinSCP for this. Open up WinSCP, click ‘new site’ and enter the ip address of the grove, the username dss, password dss and click login at the bottom. Once this connects, you can use WinSCP to copy python scripts from your computer over to the Raspberry Pi before you run them.

Mac instructions
Macs have built in software to connect to the Raspberry Pi terminal. To do this, open up the Mac Terminal, and type in ssh dss@10.148.147.244 and hit return (replace the numbers with the ip address shown on your raspberry pi display.) You should then get asked for the password (dss) and then you should get to a terminal prompt which is running on the raspberry pi itself. If you type commands into this terminal, it will run things on the Pi. For example if you want to run a python script called test.py, type python test.py and hit return.
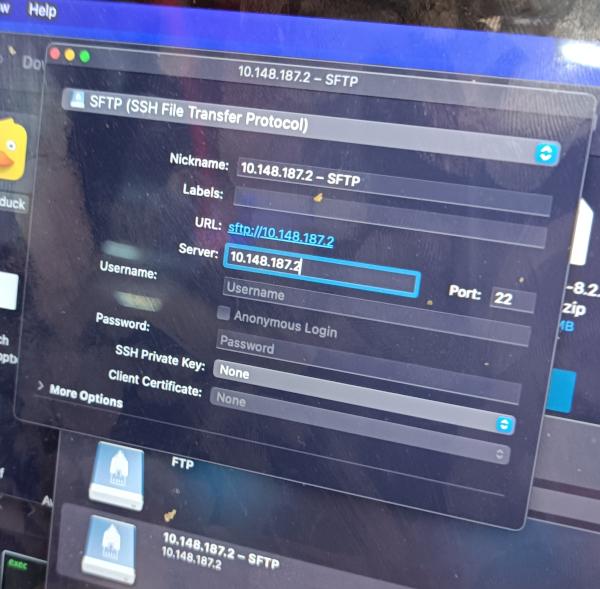
Before you can run your python scripts, you need to copy them from your computer onto the Raspberry Pi. To copy files across, we need a secure file transfer protocol(SFTP) or secure copy (SCP) program. If you’re comfortable with the Mac terminal commands, you can use scp localfile.py dss@10.148.147.244 where you replace localfile.py with the name of the python script to copy, and put in the ip address on your Raspberry Pi display. Alternatively you can install graphical software to do this. We recommend you use Cyberduck for this.
In Cyberduck, you need to make a new connection, select connection type as sftp, and enter username dss and the ip address you see on the raspberry pi.

Working with the Raspberry Pi command line
The most basic thing you will need to do on the raspberry pi is run a python script. To do this, type python script.py, replacing script.py with the name of your python script.
This will output from the script to the terminal. A lot of the time you will want to save the output from the script to a file for later analysis. To do this, you can use redirection, like this:
python script.py > output.csv which will take the output of script.py and write it to a file called output.csv.
The only downside of redirection to a file is that it redirects all output to the file, you do not see the output at all, and have to just trust that it is running okay. There is a useful tool called tee installed on the Raspberry Pis which allows you to get around this limitation, to use tee, you pipe the command output through it like this: python -u script.py | tee output.csv. Note the -u, this is important because without it, python will see that it is being piped through something, and buffer the output, so you will only see it in chunks with a large delay.